Flat roof windows are an excellent solution for brightening up interiors, enhancing ventilation, and adding a sleek, modern touch to your home. Unlike traditional pitched roof windows, flat roof windows sit flush with the roofline, making them perfect for contemporary homes, loft conversions, and extensions. Proper installation of flat roof windows is crucial to ensure long-lasting performance, energy efficiency, and complete water-tightness. In this step-by-step guide, we’ll walk you through the essential tips for installing flat roof windows correctly, helping you achieve both style and functionality in your living space.
1. Plan Your Window Placement Carefully
Before installation, take the time to plan where your flat roof window will go. Consider the following:
- Natural light: Identify areas that would benefit most from daylight, such as kitchens, living rooms, or lofts.
- Ventilation: Some flat roof windows open to allow airflow. Place them where ventilation is needed.
- Roof structure: Ensure the location avoids beams, pipes, or electrical wiring.
Proper planning prevents costly adjustments later and maximizes the window’s functionality.
2. Choose the Right Flat Roof Window
Not all flat roof windows are the same. When selecting your window, consider:
- Material: Frames can be made of uPVC, timber, or aluminum. Each has different maintenance needs and insulation properties.
- Glazing: Double or triple glazing provides better insulation and reduces heat loss.
- Size: Choose a size appropriate for your roof space and room dimensions.
Selecting the right window ensures both aesthetic appeal and long-term performance.
3. Prepare the Roof Area
Preparation is crucial for a smooth installation:
- Remove roof covering: Carefully strip the area where the window will sit. Retain any tiles or membranes that can be reused.
- Check the roof deck: Ensure the roof is structurally sound and free from rot or damage. Reinforce if necessary.
- Create a clear opening: Measure and cut the opening precisely, allowing space for flashing and insulation.
Accurate preparation reduces the risk of leaks and structural issues later on.
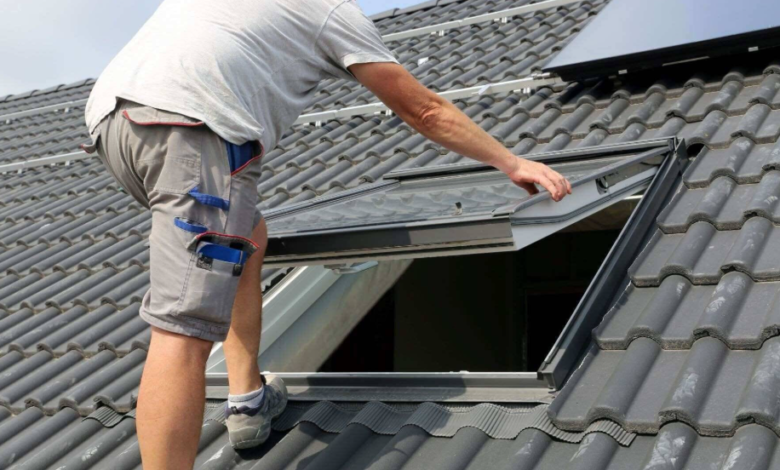
4. Install the Window Frame
The window frame is the foundation of your flat roof window installation:
- Position the frame in the opening, ensuring it is level and square.
- Secure the frame using screws or fixings recommended by the manufacturer.
- Check alignment: Use a spirit level to ensure the frame is perfectly horizontal and vertical.
A well-installed frame is essential for the window to function correctly and maintain water-tightness. To ensure long-lasting performance, working with specialists such as Skylights Roof Lanterns can provide the right expertise and premium materials for a flawless installation.
5. Apply Flashing and Waterproofing
Flat roof windows require proper flashing to prevent leaks:
- Install a pre-formed flashing kit designed for your window model.
- Seal all joints using high-quality roofing sealant to prevent water penetration.
- Check the roof membrane: Ensure it overlaps the window flashing correctly and creates a continuous barrier.
Proper flashing is critical, as flat roof windows are more prone to water pooling than pitched windows.
See also: Return on Investment (ROI) for Home Solar Systems
6. Fit the Glazing
Once the frame is secure, the glazing can be installed:
- Lift the glazing unit carefully into position. Flat roof glazing can be heavy, so it may require two people.
- Secure the glazing using the manufacturer’s clips or screws.
- Seal edges with silicone or rubber gaskets to ensure airtightness and water-tightness.
High-quality glazing and sealing improve energy efficiency and prevent drafts.
7. Install Interior Finishes
After the window is secure and weather-tight:
- Add internal insulation around the frame to prevent heat loss.
- Finish the interior trim using plasterboard, timber, or decorative casings to match your room’s style.
- Paint or seal the frame interior for durability and a polished look.
Attention to detail in the interior finish enhances the window’s appearance and comfort.
8. Check Functionality
Before completing the installation, ensure the window works properly:
- Open and close the window smoothly if it has an opening mechanism.
- Test for leaks by running water over the roof area or waiting for rain.
- Check insulation: Ensure no drafts or cold spots around the frame.
This final check ensures your flat roof window performs optimally.
9. Regular Maintenance Tips
Even after proper installation, flat roof windows require occasional maintenance:
- Clean the glazing regularly to allow maximum light penetration.
- Inspect seals and flashing annually for wear or damage.
- Lubricate moving parts to ensure smooth operation.
Regular maintenance extends the life of your window and keeps your home comfortable. For guidance on care and high-quality rooflight options, trusted providers like Skylights Roof Lanterns offer expert advice and durable products designed for long-term performance.
Conclusion
Installing a flat roof window can dramatically improve the ambiance of your home, bringing in natural light and enhancing ventilation. Following these step-by-step tips from planning and choosing the right window to installing the frame, glazing, and finishes ensures a safe, durable, and efficient installation. Proper preparation, precise installation, and routine maintenance will help you enjoy the benefits of a flat roof window for years to come.